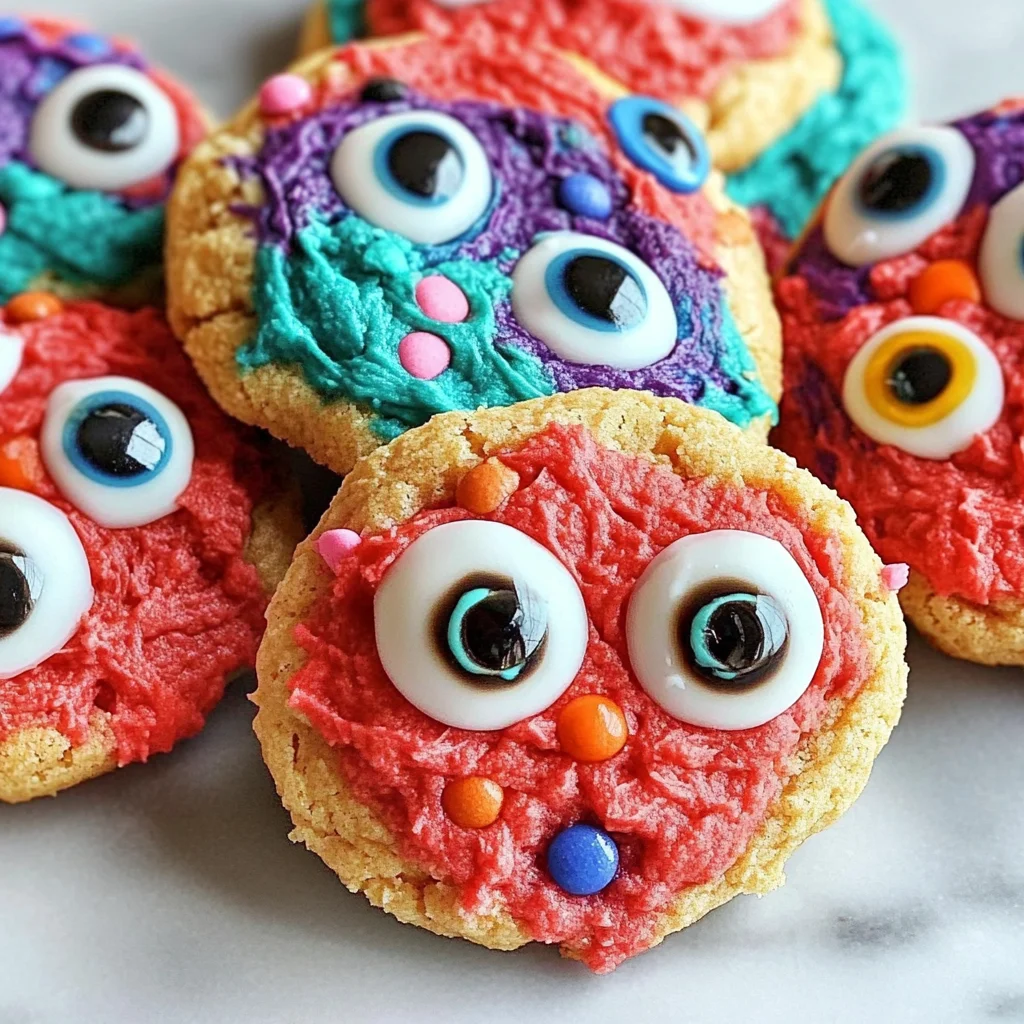
Monster Eye Cookies
If you’re looking for a fun and festive treat to make with your little ones, these Monster Eye Cookies are perfect! Halloween is the perfect time to get creative in the kitchen, and what better way to do it than by baking these vibrant, googly-eyed cookies? Not only are they a hit at family gatherings and parties, but they also spark joy in every bite. With their playful colors and adorable eyes, these Monster Eye Cookies are sure to become a new favorite in your household!
What makes this recipe even better is how simple it is. You can whip up a batch in no time, making them ideal for busy weeknights or last-minute celebrations. Plus, kids love getting involved in the decorating process, making it a delightful bonding experience!
Why You’ll Love This Recipe
- Super easy preparation: With just a few simple steps, you can create a batch of colorful cookies that look like they belong in a bakery.
- Family-friendly fun: Kids will have a blast mixing colors and placing candy eyes on their creations.
- Perfect for any occasion: These cookies aren’t just for Halloween; they can brighten up any day!
- Make-ahead convenience: Bake them in advance and store them for treats throughout the week.
Ingredients You’ll Need
You’ll be pleased to know that this recipe calls for simple, wholesome ingredients that you probably already have at home! Gather these items before you start baking your Monster Eye Cookies:
For the Cookie Dough
- 1/2 cup Butter, Softened
- 8 oz Cream Cheese, Softened
- 1 Egg
- 1/2 tsp Vanilla
- 1 box White Cake Mix
For the Colorful Touch
- Neon Food Coloring
- Candy Eyes
Variations
This recipe is flexible enough to allow for some fun variations! Here are some ideas to customize your Monster Eye Cookies:
- Change the colors: Use different shades of food coloring to match your party theme or mood.
- Add sprinkles: Mix some colorful sprinkles into the dough for extra texture and sweetness.
- Use different toppings: Instead of candy eyes, you could use chocolate chips or other fun edible decorations.
- Make them gluten-free: Swap out the white cake mix with a gluten-free version to accommodate dietary needs.
How to Make Monster Eye Cookies
Step 1: Preheat Your Oven
First things first—preheat your oven to 350 degrees Fahrenheit. This ensures that your cookies bake evenly. Line a baking sheet with parchment paper so the cookies won’t stick!
Step 2: Cream the Base Together
In a mixing bowl, beat together softened butter, cream cheese, egg, and vanilla until smooth. This step is crucial as it creates a creamy base for your cookies. Then mix in the white cake mix until everything is well combined. You want it smooth and fluffy!
Step 3: Color Your Batter
Now comes the fun part! Divide your batter into separate bowls based on how many colors you want. Add neon food coloring to each bowl and mix until vibrant. The bright colors will make your cookies truly eye-catching!
Step 4: Scoop and Shape
Using a cookie scoop or tablespoon, scoop out about 1½ tablespoons of dough and place them onto your prepared baking sheet. Make sure there’s enough space between each scoop so they can spread while baking.
Step 5: Bake Them Up
Pop those cookies into the oven and bake for about 10 minutes. You’ll know they’re ready when they look set but still soft in the center—this helps keep them chewy!
Step 6: Add Candy Eyes
As soon as you take the cookies out of the oven, add candy eyes while they’re still warm. This way, they’ll stick perfectly! It’s such a delightful touch that makes these cookies come alive.
And there you have it—your very own batch of Monster Eye Cookies! Enjoy making memories while indulging in these delicious treats!
Pro Tips for Making Monster Eye Cookies
Creating these delightful Monster Eye Cookies is a breeze, especially with a few handy tips to guide you along the way!
-
Use Room Temperature Ingredients: Starting with softened butter and cream cheese ensures a smooth batter that mixes evenly, resulting in perfectly fluffy cookies.
-
Be Creative with Colors: Don’t be afraid to mix and match neon food colors! This not only makes your cookies visually stunning but also adds a fun twist that your kids will love.
-
Scoop Evenly: Use a cookie scoop or measuring spoon to ensure all cookies are the same size. This helps them bake evenly, so they all come out perfectly soft and chewy.
-
Add Eyes Quickly: Placing the candy eyes on the warm cookies right out of the oven allows them to stick better, giving your monster creations their signature googly look!
-
Store Properly: Keep leftover cookies in an airtight container at room temperature for up to 5 days. This keeps them fresh and tasty for those who want to savor them later!
How to Serve Monster Eye Cookies
Presenting your Monster Eye Cookies can be just as fun as making them! With some creative ideas, you can turn these treats into an eye-catching centerpiece for any Halloween gathering.
Garnishes
- Sprinkles: Add a sprinkle of colorful edible glitter or Halloween-themed sprinkles on top for an extra festive touch.
- Chocolate Drizzle: A light drizzle of melted white chocolate on top can give a beautiful contrast and enhance the sweetness.
Side Dishes
- Fruit Cup: A refreshing fruit salad made with seasonal fruits like apples, oranges, and grapes offers a healthy balance to the sweet cookies.
- Popcorn: Sweet or savory popcorn can serve as a great crunchy companion, adding texture and variety to your dessert table.
- Veggie Platter: Colorful veggies with hummus dip provide a healthy option, ensuring there’s something for everyone at your Halloween party!
- Hot Chocolate: Pairing these cookies with a warm cup of hot chocolate can create a cozy atmosphere that’s perfect for chilly fall nights.
These serving suggestions will help elevate your Monster Eye Cookies from simply delicious treats to an unforgettable part of your Halloween celebrations! Enjoy baking and sharing these spooky goodies!

Make Ahead and Storage
These Monster Eye Cookies are not just fun to make; they’re also great for meal prep! You can whip up a batch ahead of time and have them ready for your Halloween gatherings or cozy family nights. Here’s how to keep your cookies fresh and tasty.
Storing Leftovers
- Store the cookies in an airtight container at room temperature.
- They can last up to 5 days, but trust me, they’ll probably be gone before then!
Freezing
- To freeze, let the cookies cool completely.
- Place them in a single layer on a baking sheet and freeze until solid.
- Once frozen, transfer them to a freezer-safe bag or container. They will keep for up to 3 months.
Reheating
- If you want to enjoy your cookies warm, preheat your oven to 300°F (150°C).
- Place the cookies on a baking sheet and heat for about 5-7 minutes until warmed through.
FAQs
Here are some common questions about making Monster Eye Cookies:
Can I use different food coloring for Monster Eye Cookies?
Absolutely! While neon colors make them pop, you can use any food coloring you prefer to create unique designs.
How do I store my Monster Eye Cookies?
Store them in an airtight container at room temperature for up to 5 days. For longer storage, freeze them as directed above!
What should I do if my Monster Eye Cookies spread too much?
If your cookies spread out more than you’d like, try chilling the dough for about 30 minutes before baking. This helps them maintain their shape!
Can I customize the toppings on my Monster Eye Cookies?
Yes! Feel free to get creative with various candies or sprinkles instead of candy eyes if you want a different look.
Final Thoughts
I hope you and your family have as much fun making these colorful Monster Eye Cookies as I do! They’re a delightful treat that brings smiles and laughter, perfect for any festive occasion. Enjoy creating these gooey delights and don’t hesitate to share your creations with friends! Happy baking!
Monster Eye Cookies

Bring Halloween fun into your kitchen with these colorful Monster Eye Cookies! Easy to make and perfect for kids—try this recipe today!
- Prep Time: 15 minutes
- Cook Time: 10 minutes
- Total Time: 25 minutes
- Yield: Approximately 24 cookies 1x
- Category: Dessert
- Method: Baking
- Cuisine: American
Ingredients
- 1/2 cup softened butter
- 8 oz softened cream cheese
- 1 egg
- 1/2 tsp vanilla extract
- 1 box white cake mix
- Neon food coloring
- Candy eyes
Instructions
- Preheat your oven to 350°F (175°C) and line a baking sheet with parchment paper.
- In a mixing bowl, beat the softened butter, cream cheese, egg, and vanilla until smooth. Gradually mix in the white cake mix until fully combined.
- Divide the dough into bowls and add neon food coloring to each bowl until you achieve your desired shades.
- Scoop about 1½ tablespoons of dough onto the prepared baking sheet, spacing them apart.
- Bake for about 10 minutes until set but still soft in the center.
- Immediately place candy eyes on top while warm so they stick.
Nutrition
- Serving Size: 1 serving
- Calories: 135
- Sugar: 7g
- Sodium: 70mg
- Fat: 6g
- Saturated Fat: 3g
- Unsaturated Fat: 3g
- Trans Fat: 0g
- Carbohydrates: 18g
- Fiber: <1g
- Protein: 2g
- Cholesterol: 20mg