Halloween No Bake Cheesecake
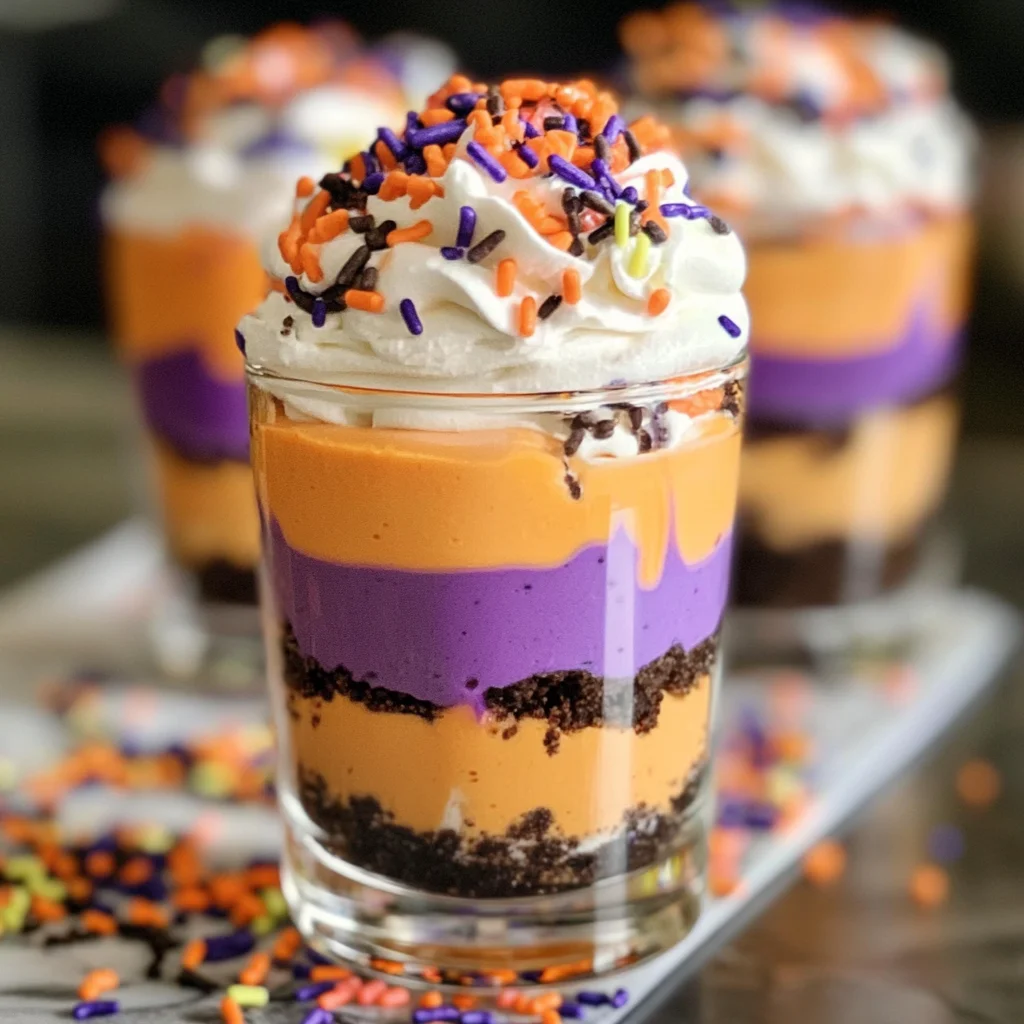
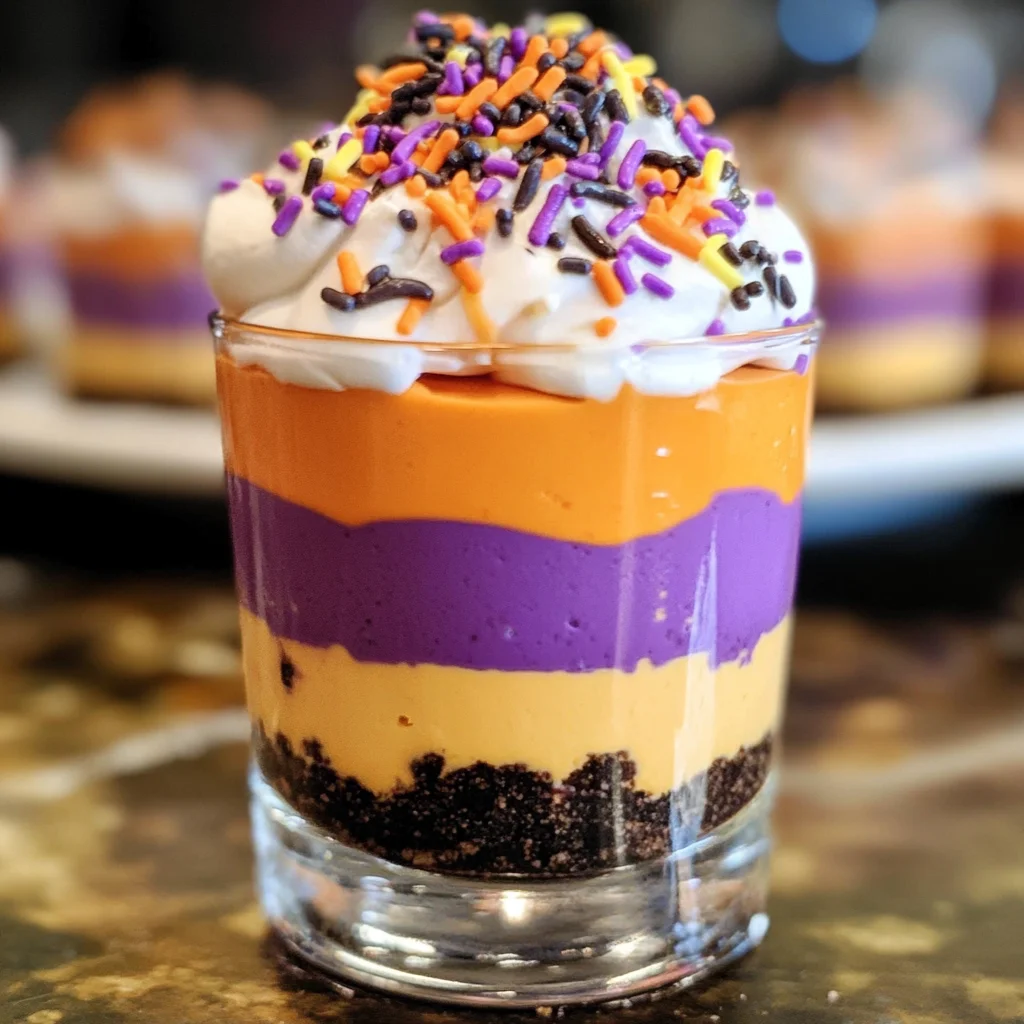
If you’re looking for a fun and festive dessert to celebrate the Halloween season, you’ve come to the right place! This Halloween No Bake Cheesecake is not only easy to make, but it’s also a delightful treat that everyone will love. With its vibrant orange and purple layers, it’s perfect for family gatherings, parties, or just a cozy evening at home. Plus, it comes together in less than 10 minutes and can be made ahead of time. What’s not to love?
This no-bake cheesecake is my go-to for fall festivities. It combines the creamy goodness of cheesecake with the whimsical colors of Halloween, making it a showstopper at any gathering. Trust me, your friends and family will be raving about this dessert long after the last bite!
Why You’ll Love This Recipe
- Super Easy to Make: With just a few simple steps, you can whip up this cheesecake in no time!
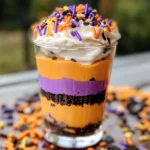
- Visually Stunning: The bright layers of orange and purple create a beautiful presentation that fits perfectly with Halloween themes.
- No Baking Required: Enjoy all the flavors of cheesecake without turning on your oven—perfect for warm autumn days!
- Make Ahead Convenience: Prepare this dessert ahead of time so you can enjoy your party stress-free.
- Family-Friendly Fun: Kids will love helping to layer the colorful cheesecake in glasses!
Ingredients You’ll Need
You won’t need a long list of complicated ingredients for this delightful treat. All you need are simple, wholesome ingredients that come together beautifully in this Halloween No Bake Cheesecake.
For the Cheesecake Filling
- 2 cups heavy whipping cream
- 1 cup powdered sugar
- 1 teaspoon vanilla extract
- 8 ounces cream cheese (softened)
- orange gel food coloring
- purple gel food coloring
For the Crust
- 8 Oreo cookies
For Topping
- sprinkles
Variations
This Halloween No Bake Cheesecake is wonderfully flexible! Here are some fun ways to mix things up:
- Change the Colors: Use different gel food colorings like green and black for a spooky twist!
- Add Flavor: Mix in some pumpkin spice or cinnamon to give your filling a seasonal flavor boost.
- Try Different Cookies: Swap out Oreos for graham crackers or another favorite cookie for the crust.
- Go Dairy-Free: Substitute coconut cream for heavy whipping cream and vegan cream cheese for a dairy-free version.
How to Make Halloween No Bake Cheesecake
Step 1: Whip the Cream
Start by adding heavy whipping cream to your mixer bowl. Beat it at medium speed until it begins to thicken. Then crank up the speed to high and continue beating until stiff peaks form. This step is crucial because whipped cream gives your cheesecake its light and fluffy texture!
Step 2: Sweeten It Up
Once you see those lovely peaks forming, add in the powdered sugar and vanilla extract. Beat again until everything is well combined. The sweetness balances out the tangy cream cheese later on.
Step 3: Prepare Cream Cheese Mixture
In a clean bowl, add softened cream cheese and beat it until it’s light and fluffy—this should take about 2-3 minutes. This step ensures that your cheesecake filling is smooth without any lumps.
Step 4: Combine Whipped Cream with Cream Cheese
Next, take that larger bowl of sweetened whipped cream we made earlier and gently fold it into the softened cream cheese mixture at medium speed until well combined. This provides that creamy consistency we all love.
Step 5: Colorful Layers
Separate your mixture into two bowls. Add about 8-10 drops of orange gel food coloring to one bowl and purple gel food coloring to the other. Stir each bowl with different spoons until beautifully blended—this adds that fun Halloween vibe!
Step 6: Pipe It Perfectly
Spoon each colored filling into separate piping bags (or zip-top bags with corners cut). Place the reserved whipped cream into another piping bag as well. Standing them up in glasses makes it easier when you’re ready to layer everything.
Step 7: Crush Those Cookies
For the crust, place Oreo cookies into a zip-top bag, seal it tight, and crush them into crumbs using a rolling pin. This creates a delicious base that complements our creamy layers.
Step 8: Layer It Up!
Begin layering by spooning crushed Oreo crumbs into serving glasses followed by piping in alternating layers of orange and purple cheesecake filling. Top everything off with whipped cream and sprinkle on those festive sprinkles!
Step 9: Chill Out
Finally, allow your cheesecakes to chill in the fridge for about three hours before serving. This helps set everything nicely so each layer holds its shape when you dig in!
There you have it—your very own Halloween No Bake Cheesecake! Enjoy every delicious bite!
Pro Tips for Making Halloween No Bake Cheesecake
Creating the perfect Halloween No Bake Cheesecake is a breeze with these handy tips!
-
Use room temperature cream cheese: Allowing your cream cheese to soften before mixing ensures a smooth and creamy texture, preventing any lumps in your cheesecake filling.
-
Whip the cream to stiff peaks: This creates a light and airy cheesecake that holds its shape beautifully. Be careful not to overbeat or you’ll end up with butter!
-
Color carefully: When adding food coloring, start with a few drops at a time and mix thoroughly. This way, you can achieve your desired shade without going too dark.
-
Chill for optimal results: Giving your cheesecake 3 hours in the fridge helps it set properly, making it easier to layer and serve. Patience pays off!
-
Get creative with layers: Don’t hesitate to alternate colors in unique patterns or even add extra layers of crushed cookies for added crunch. Personalizing your cheesecake makes it even more festive!
How to Serve Halloween No Bake Cheesecake
Presentation matters when showcasing this delightful dessert! Here are some fun ways to serve your Halloween No Bake Cheesecake that will impress your guests.
Garnishes
- Whipped cream clouds: A dollop of freshly whipped cream on top adds elegance and enhances the creamy texture of the cheesecake.
- Candy corn: These iconic candies make for an adorable and seasonal topping that adds a sweet crunch.
- Chocolate shavings or curls: A sprinkle of chocolate on top will contrast beautifully with the bright orange and purple colors, adding a touch of richness.
Side Dishes
- Spiced apple slices: Crisp apple slices dusted with cinnamon make for a refreshing side that complements the richness of the cheesecake.
- Pumpkin-flavored cookies: These will enhance the fall theme and provide an enjoyable textural contrast alongside the creamy dessert.
- Vanilla bean ice cream: A scoop of vanilla ice cream is a classic pairing that balances out the sweetness while providing a delightful creaminess.
- Caramel popcorn: This crunchy treat brings an unexpected twist that’s both fun and festive, perfect for Halloween gatherings!
Now you’re all set to whip up this delicious Halloween No Bake Cheesecake! Get ready to impress family and friends with not just the taste, but also how wonderfully it looks on your dessert table. Happy baking!
Make Ahead and Storage
This Halloween No Bake Cheesecake is a fantastic option for meal prep, making it perfect for busy schedules or festive gatherings. You can easily prepare it ahead of time and store it until you’re ready to serve, ensuring a stress-free celebration.
Storing Leftovers
- Store any leftover cheesecake in an airtight container in the refrigerator.
- It will stay fresh for up to 3 days.
- If you have layered servings in glasses, cover them with plastic wrap to maintain their appearance.
Freezing
- The cheesecake can be frozen for up to 2 months.
- To freeze, place the individual servings in airtight containers or wrap them well in plastic wrap and then aluminum foil.
- Thaw overnight in the refrigerator before serving.
Reheating
- Since this is a no-bake dessert, there’s no need to reheat it.
- Simply remove from the fridge or freezer and enjoy chilled!
FAQs
Here are some common questions about the Halloween No Bake Cheesecake that may help you out!
Can I use a different color for the Halloween No Bake Cheesecake?
Absolutely! Feel free to use any gel food coloring that suits your Halloween theme—green, black, or even spooky shades of blue would work wonderfully.
How long does it take to make the Halloween No Bake Cheesecake?
This easy recipe takes just around 10 minutes of prep time! However, remember to chill it for at least 3 hours for the best texture and flavor.
Can I substitute the cream cheese in the Halloween No Bake Cheesecake?
Yes! You can use a dairy-free cream cheese alternative if you’re looking for a non-dairy option. Just ensure it’s softened beforehand for easier mixing.
Is the Halloween No Bake Cheesecake suitable for kids?
Definitely! This fun and colorful dessert is perfect for kids and adults alike. Just keep an eye on any allergies related to ingredients like cream cheese or Oreos.
How can I decorate my Halloween No Bake Cheesecake?
You can get creative with toppings! Consider adding candy corn, chocolate spiders, or festive edible glitter for an extra spooky touch.
Final Thoughts
I hope you find joy in making this delightful Halloween No Bake Cheesecake! It’s not just a treat; it’s a way to celebrate fall flavors while having fun with colors and decorations. Whether you’re serving it at a party or enjoying it at home with loved ones, this dessert is sure to bring smiles all around. Happy baking (without baking!), and enjoy every delicious bite!
Halloween No Bake Cheesecake
Looking for a fun and festive dessert to celebrate Halloween? This Halloween No Bake Cheesecake is your go-to treat! With its vibrant orange and purple layers, it’s not only visually appealing but also incredibly easy to make—ready in under 10 minutes! Perfect for family gatherings, parties, or cozy evenings at home, this delightful cheesecake combines the creamy goodness of traditional cheesecake with a whimsical Halloween touch. Plus, it can be made ahead of time, ensuring you can enjoy the festivities without any stress.
- Prep Time: 10 minutes
- Cook Time: None
- Total Time: 0 hours
- Yield: Serves 6
- Category: Dessert
- Method: No Bake
- Cuisine: American
Ingredients
- 2 cups heavy whipping cream
- 1 cup powdered sugar
- 1 teaspoon vanilla extract
- 8 ounces cream cheese (softened)
- Orange gel food coloring
- Purple gel food coloring
- 8 Oreo cookies (or other cookie of choice for crust)
- Sprinkles for topping
Instructions
- In a mixing bowl, whip heavy cream until stiff peaks form. Add powdered sugar and vanilla; mix until combined.
- In a separate bowl, beat softened cream cheese until fluffy. Gently fold in whipped cream.
- Divide mixture into two bowls; color one orange and the other purple with gel food coloring.
- Crush Oreo cookies in a zip-top bag until fine crumbs form.
- Layer crushed cookies and alternating colored cheesecake filling in serving glasses.
- Top with whipped cream and festive sprinkles.
- Chill in the refrigerator for at least 3 hours before serving.
Nutrition
- Serving Size: 1 glass (150g)
- Calories: 320
- Sugar: 25g
- Sodium: 100mg
- Fat: 24g
- Saturated Fat: 14g
- Unsaturated Fat: 8g
- Trans Fat: 0g
- Carbohydrates: 28g
- Fiber: 1g
- Protein: 3g
- Cholesterol: 70mg