Jalapeño Popper Mummies
If you’re looking for a fun and delicious treat that will impress your family and friends, these Jalapeño Popper Mummies are the perfect choice! They’re not only adorable but also packed with flavor, making them a fantastic appetizer for any occasion—from Halloween parties to cozy family nights. The combination of creamy filling and flaky dough is simply irresistible, and trust me, once you serve these little mummies, everyone will be coming back for more.
What makes this recipe special is how easy it is to make. With just a handful of simple ingredients, you can whip up a batch of these spooky snacks in no time. Plus, they are family-friendly, so even the little ones will love helping out in the kitchen as they watch the mummies come to life!
Why You’ll Love This Recipe
- Super Simple: This recipe comes together quickly with minimal prep work, making it perfect for busy weeknights or last-minute gatherings.
- Family Fun: Get the kids involved! They’ll enjoy stuffing the jalapeños and wrapping them like little mummies.
- Make Ahead: You can prepare these poppers in advance and bake them just before serving. They’re great for meal prep!
- Flavor Explosion: Creamy cheese, spicy jalapeños, and crispy dough create a delightful contrast that everyone will love.
Ingredients You’ll Need
These ingredients are all about simplicity and flavor. Each one plays an important role in making these Jalapeño Popper Mummies not only tasty but also delightful to look at!
For the Filling
- 8 jalapenos
- 1 (8 ounce) package of cream cheese, softened
- 3 tablespoons sour cream
- ¼ cup bacon bits
- ½ cup Colby jack cheese, shredded
- ½ tablespoon garlic powder
- ¼ tablespoon onion powder
- 1 teaspoon red pepper flakes
- 1 teaspoon black pepper
For the Wrapping
- 1 (8 ounce) package of crescent dough sheets (different from crescent rolls)
- 32 small candy eyes
Variations
This recipe is super flexible! Feel free to mix things up based on what you have or your taste preferences. Here are some fun variations:
- Change the Cheese: Swap out Colby jack cheese for cheddar or pepper jack for an extra kick!
- Add Veggies: Toss in some finely chopped bell peppers or green onions to the filling for added crunch.
- Make It Spicy: If you love heat, include some diced jalapeños in the cream cheese mixture or use spicy bacon bits.
- Go Vegan: Substitute cream cheese with a plant-based alternative and use vegan bacon bits for a delicious vegan version.
How to Make Jalapeño Popper Mummies
Step 1: Preheat Your Oven
Start by preheating your oven to 400 degrees Fahrenheit. This step is crucial because a hot oven ensures that your mummies cook evenly and achieve that golden-brown color we all love.
Step 2: Prepare the Jalapeños
Slice each jalapeño lengthwise and scoop out the seeds using a spoon. It’s important to remove the seeds if you want to tone down the heat—this makes them more enjoyable for everyone!
Step 3: Make the Filling
In a large bowl, combine softened cream cheese, sour cream, bacon bits, Colby jack cheese, garlic powder, onion powder, red pepper flakes, and black pepper. Mix well until everything is creamy and combined. This filling is where all the magic happens; it adds richness and flavor that pairs perfectly with the spicy jalapeños.
Step 4: Fill Your Jalapeños
Transfer your creamy filling into a piping bag (or a zip-lock bag with one corner snipped off). Carefully fill each hollowed jalapeño half with this delicious mixture. Arrange them on your lined baking sheet about an inch apart—they need space to breathe!
Step 5: Wrap Them Up
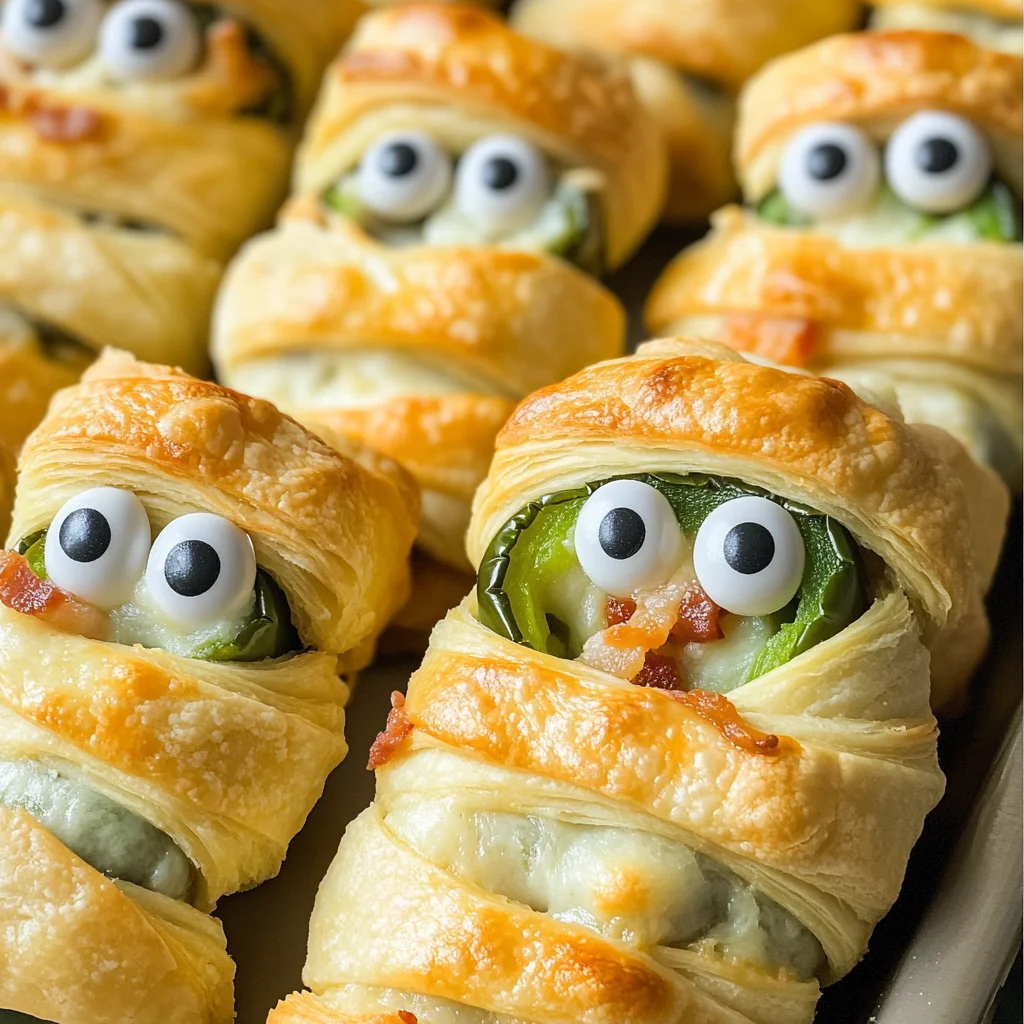
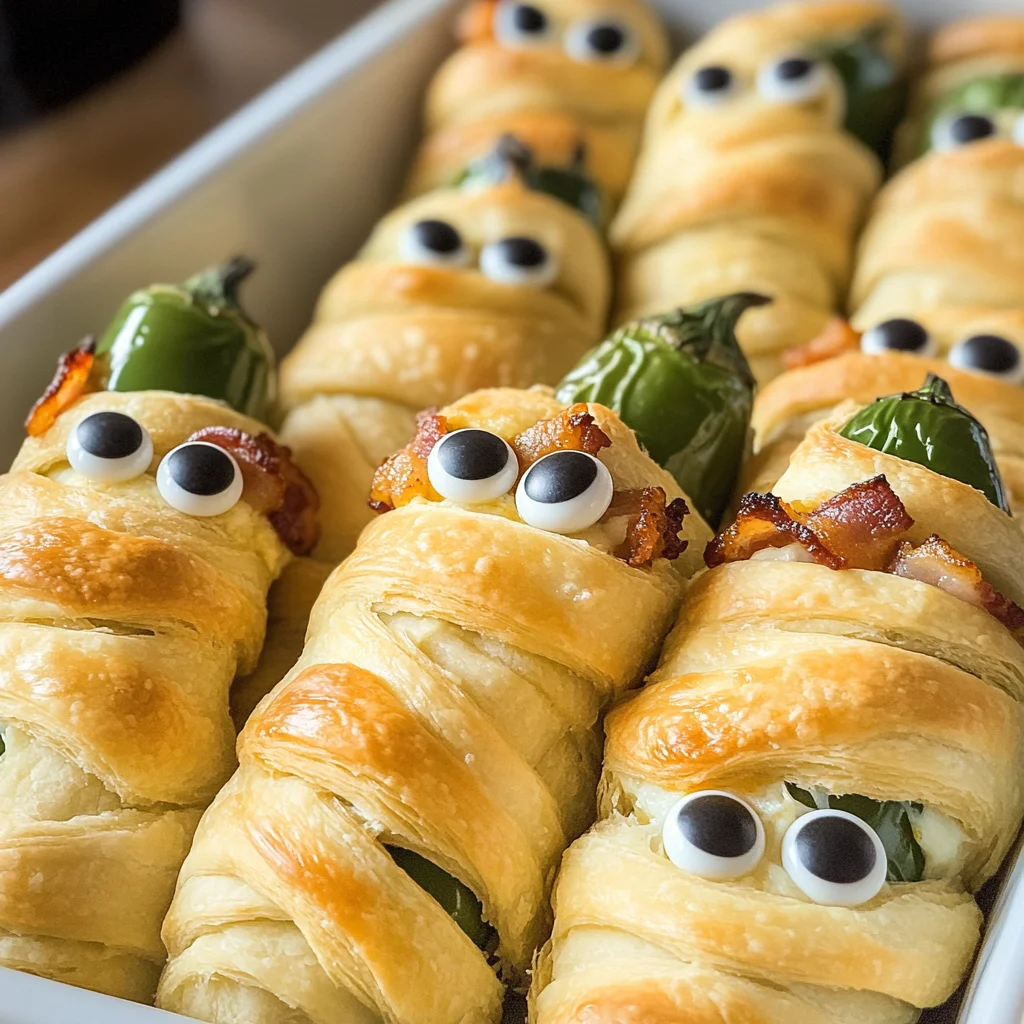
Lay out your crescent dough sheets and cut them into strips using a small knife. Wrap each stuffed jalapeño with a strip of dough in a spiral fashion from top to bottom, leaving space at the top for those cute candy eyes. This wrapping gives the mummies their spooky appearance.
Step 6: Bake to Perfection
Bake your mummies in preheated oven for about 10-12 minutes or until they turn golden brown. Once baked, add two candy eyes atop each jalapeño while they’re still warm—this makes them come alive!
Step 7: Serve Warm
These Jalapeño Popper Mummies are best enjoyed fresh from the oven when they’re warm and gooey inside. Serve them alongside your favorite dipping sauce if desired—enjoy every bite!
Pro Tips for Making Jalapeño Popper Mummies
Creating the perfect Jalapeño Popper Mummies can be both fun and rewarding! Here are some tips to ensure your spooky snacks turn out just right.
-
Choose fresh jalapeños: Selecting firm, vibrant jalapeños not only enhances the flavor but also ensures sturdiness while stuffing. Fresh peppers will hold their shape better during baking.
-
Soften the cream cheese properly: Allowing your cream cheese to come to room temperature makes it easier to mix and pipe into the jalapeños. A well-blended filling ensures a smooth texture and even distribution of flavors.
-
Cut dough strips evenly: Ensuring your crescent dough strips are cut consistently allows for an even wrap around each jalapeño. This creates a uniform appearance and helps them bake evenly.
-
Don’t overbake: Keep an eye on your mummies while they bake! Overbaking can lead to dry dough. Aim for that lovely golden brown color, which usually takes about 10-12 minutes.
-
Experiment with fillings: Feel free to customize the cream cheese mixture by adding extras like diced green onions, shredded chicken, or even different cheeses. Personalizing it makes the dish uniquely yours!
How to Serve Jalapeño Popper Mummies
These delightful Jalapeño Popper Mummies are not just tasty but also striking when presented right. Here are some creative ways to serve them at your next gathering!
Garnishes
- Chopped fresh cilantro: Adds a pop of color and freshness that complements the spicy jalapeños beautifully.
- Sour cream drizzle: A dollop or drizzle of sour cream adds a creamy element that balances the heat, making each bite even more enjoyable.
Side Dishes
-
Guacamole: The creamy, rich flavor of guacamole pairs perfectly with the spiciness of the jalapeño poppers. Plus, it adds a nice contrast in texture.
-
Vegetable platter: Offer a variety of fresh veggies like carrots, celery, and bell peppers. Their crispness provides a refreshing balance to the richness of the poppers.
-
Tortilla chips: Crunchy tortilla chips make for a fantastic side that guests can use to scoop up any extra filling or dips you provide alongside.
By thoughtfully presenting these Jalapeño Popper Mummies and pairing them with complementary sides and garnishes, you’ll create an unforgettable appetizer experience that your guests will love! Enjoy serving up these spooky treats at your next Halloween gathering or any festive occasion!
Make Ahead and Storage
These Jalapeño Popper Mummies are perfect for meal prep! You can whip them up ahead of time, making your next gathering or weeknight dinner a breeze.
Storing Leftovers
- Allow the poppers to cool completely before storing.
- Place them in an airtight container in the refrigerator.
- They can be kept for up to 3 days.
Freezing
- After baking, let the Jalapeño Popper Mummies cool completely.
- Arrange them in a single layer on a baking sheet and freeze until solid.
- Once frozen, transfer them to a freezer-safe bag or container, where they can last up to 2 months.
Reheating
- For best results, reheat in the oven at 350°F (175°C) until warmed through, about 10 minutes.
- Alternatively, you can microwave them for about 30-45 seconds, but this may result in a softer dough.
FAQs
Got questions? Here are some common inquiries about making these delightful Jalapeño Popper Mummies!
Can I make Jalapeño Popper Mummies without bacon bits?
Absolutely! You can substitute bacon bits with crispy onions or leave them out entirely. The cream cheese mixture will still be delicious!
How do I know when the Jalapeño Popper Mummies are done baking?
The poppers are ready when the crescent dough is golden brown. Keep an eye on them towards the end of the baking time to avoid over-baking.
Can I use different types of cheese for Jalapeño Popper Mummies?
Definitely! Feel free to experiment with other cheeses like cheddar or pepper jack for a spicier kick.
Final Thoughts
I hope you’re just as excited to make these adorable Jalapeño Popper Mummies as I am! They’re not only perfect for Halloween but also a fun treat anytime you want something delicious and comforting. Enjoy creating these spooky snacks, and don’t forget to share your experience! Happy cooking!
Dinner
Jalapeño Popper Mummies

Looking for a fun and delicious appetizer that will wow your guests? These Jalapeño Popper Mummies are the ultimate treat! Bursting with flavor, they combine creamy cheese, zesty jalapeños, and flaky dough to create a delightful snack that’s perfect for any occasion—from Halloween parties to cozy family gatherings. Easy to make and even more enjoyable to eat, these mummies are sure to become a favorite. Get the kids involved in the kitchen as you craft these spooky snacks together!
- Prep Time: 15 minutes
- Cook Time: 12 minutes
- Total Time: 27 minutes
- Yield: Approximately 16 servings 1x
- Category: Appetizer
- Method: Baking
- Cuisine: American
Ingredients
- 8 jalapeños
- 1 (8 oz) package cream cheese, softened
- 3 tablespoons sour cream
- ½ cup shredded Colby jack cheese
- 1 (8 oz) package crescent dough sheets
- 32 small candy eyes
Instructions
- Preheat your oven to 400°F (200°C).
- Slice each jalapeño lengthwise and remove seeds.
- In a bowl, mix cream cheese, sour cream, shredded cheese, garlic powder, onion powder, red pepper flakes, and black pepper until combined.
- Fill each jalapeño half with the mixture using a piping bag or zip-lock bag.
- Cut crescent dough into strips and wrap around each stuffed jalapeño.
- Bake for 10-12 minutes until golden brown. Add candy eyes while warm.
- Serve immediately and enjoy!
Nutrition
- Serving Size: 1 serving
- Calories: 160
- Sugar: 1g
- Sodium: 250mg
- Fat: 11g
- Saturated Fat: 5g
- Unsaturated Fat: 6g
- Trans Fat: 0g
- Carbohydrates: 10g
- Fiber: 1g
- Protein: 5g
- Cholesterol: 20mg